Quick Start Guide - ECO1624 Device
Prerequisites
Before setting up your ECO1624 device, make sure your Home Assistant environment is ready with MQTT support.
Install MQTT (Mosquitto broker) Add-on
- In Home Assistant, go to Settings → Add-ons → Add-on Store.
- Search for Mosquitto broker and click Install.
-
- (Recommended) Create a dedicated MQTT user: Settings → People → Users → Add user
- Username:
mqtt(example) - Password:
your-strong-password - Do not make it an administrator.
- Open the Mosquitto broker add-on → Configuration: leave defaults (the add-on uses HA users).
- Click Start, and optionally Start on boot, Autoupdate
-
- Note the connection details for your device:
- MQTT Server: IP of your HA box (e.g.,
192.168.8.90) - Port:
1883(non-TLS) or8883(TLS, only if you set it up) - MQTT Username/Password: the user you created in step 3.
Getting Started
You can configure the ECO1624 either with the EcoEdge.io iOS app (over Bluetooth) or through the device's built-in WiFi portal. Both collect the same Configuration Parameters listed below.
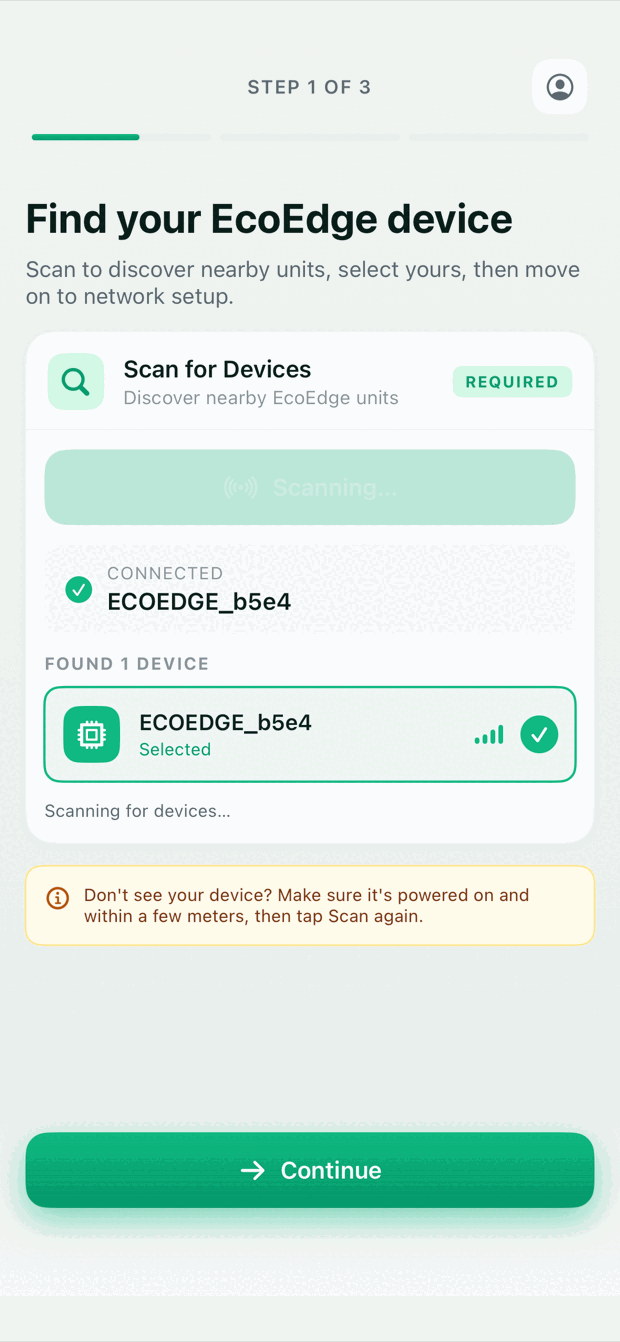
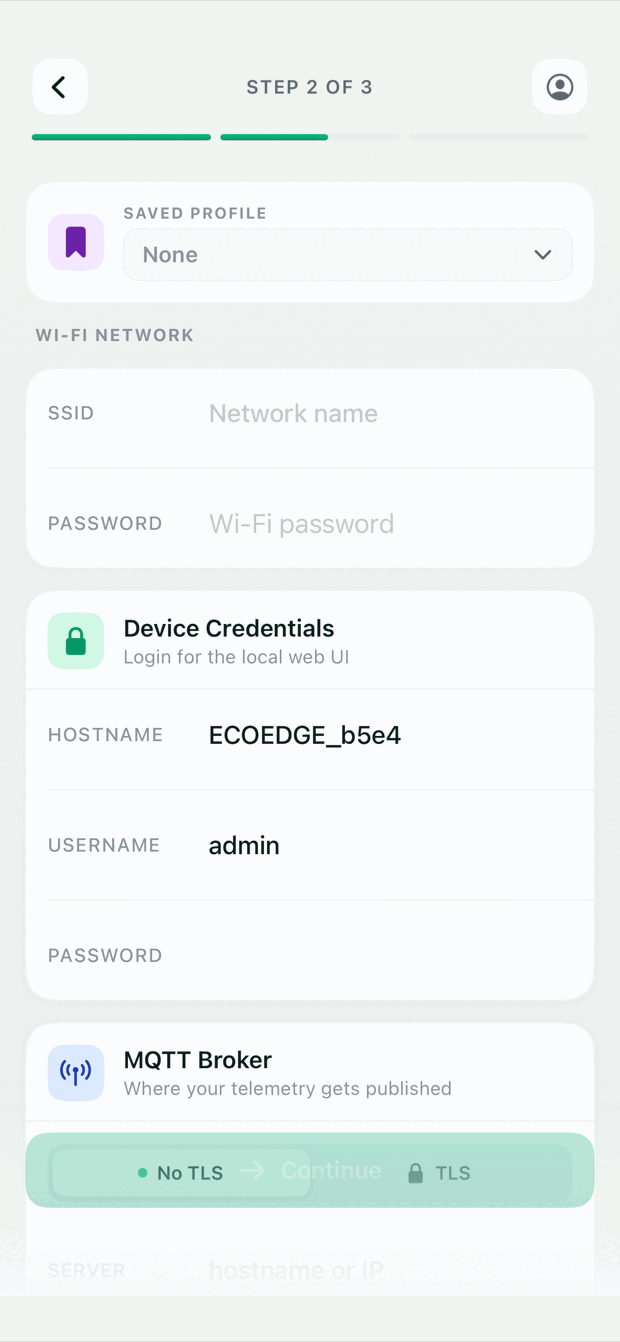
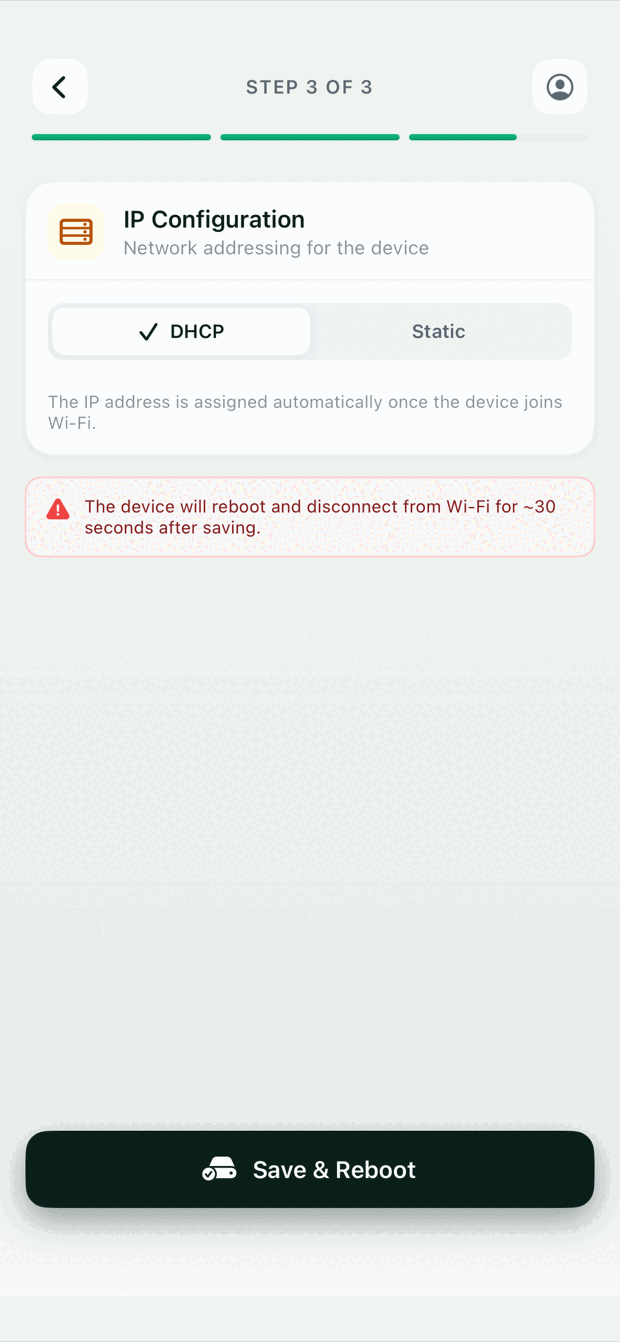
The EcoEdge.io app guides you through setup in three steps:
- Download the app from the Apple App Store.
- Find your device — scan for nearby devices and choose the one with the
ECOEDGE_prefix. Signal strength is shown for each device. - Network & login — enter your WiFi, MQTT, and device login details. The hostname is pre-filled from the selected device.
- IP configuration — choose DHCP or Static, then tap Save & Reboot. The device reboots and disconnects for about 30 seconds while the settings are applied.
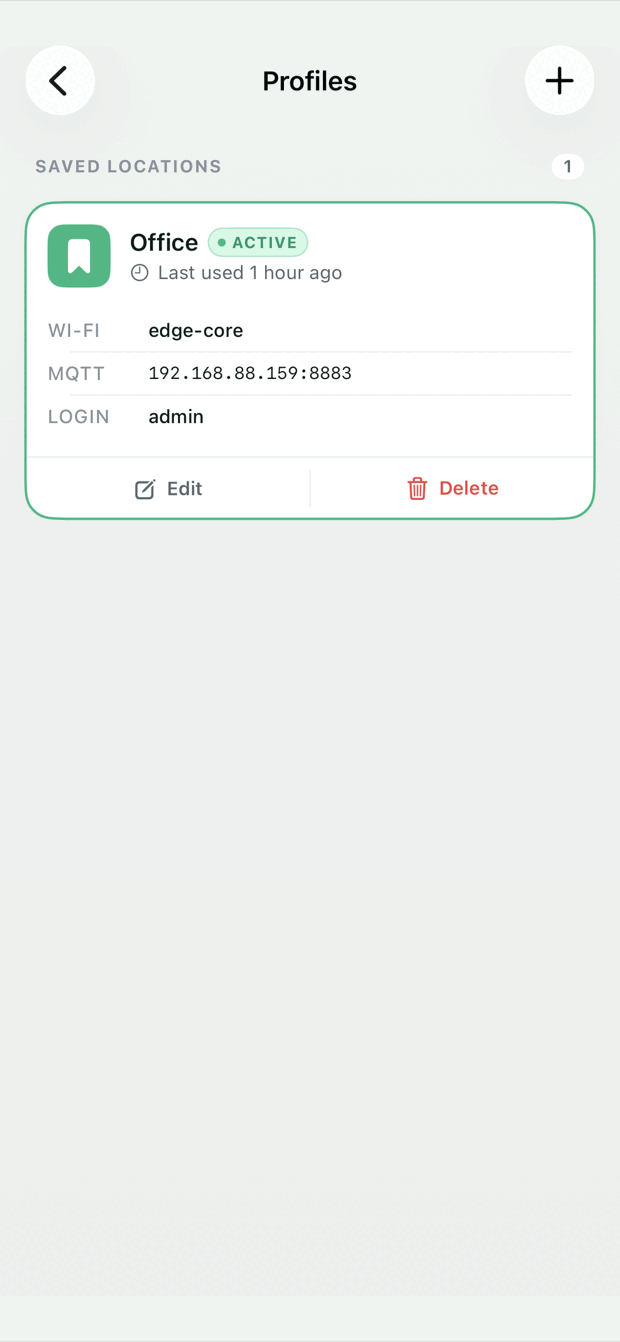
Setting up more than one device?
Save a location's WiFi, MQTT, and login settings as a named profile (e.g., Home, Office) and apply it to the next device in one tap. Credentials are stored securely on your phone.
- Turn on the ECO1624 device. The LED indicator will light up.
- Find the WiFi connection (access point) named EcoEdge-Setup and connect.
- Password:
password
- Password:
- After a successful WiFi connection, a configuration window with parameters will automatically open.
- If the window does not open automatically, open a web browser and enter the address: http://192.168.4.1
- Fill in the Configuration Parameters and click Save Configuration. The device reboots to apply the settings.
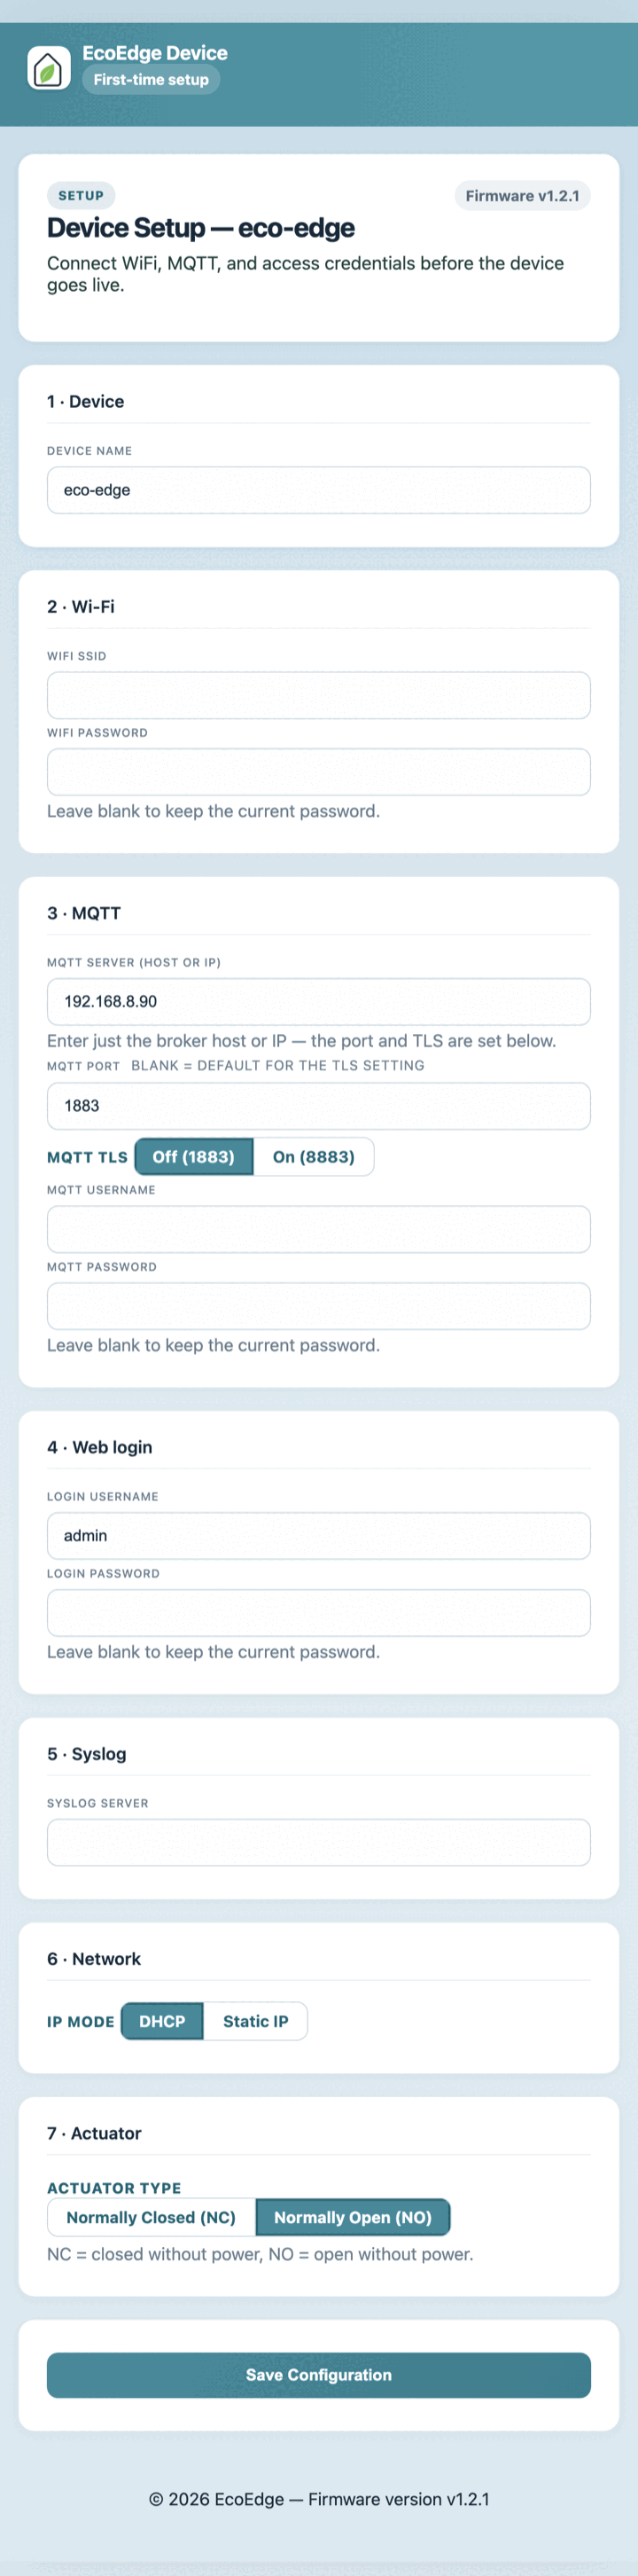
Configuration Parameters
-
- Device Name
- Choose a unique name to make it easier to identify the device in Home Assistant later. Labelled Hostname in the iOS app, where it is pre-filled from the selected device. (Mandatory)
-
- WiFi SSID
- Your WiFi Access Point SSID. (Mandatory)
-
- WiFi Password
- Your WiFi Access Point password. (Mandatory)
-
- MQTT Server
- MQTT server hostname or IP address, e.g.,
192.168.8.90. Enter just the host or IP — nomqtt://prefix or port; those are set separately below. (Mandatory)
-
- MQTT Port
- MQTT server port. Leave blank to use the default for your TLS setting:
1883(TLS off) or8883(TLS on). (Optional)
-
- MQTT TLS
- Turn on if your broker uses SSL/TLS. Default: off. (Optional)
-
- MQTT Username
- MQTT server username, if authentication is enabled. (Optional)
-
- MQTT Password
- MQTT server password, if authentication is enabled. (Optional)
-
- Login Username
- Device web UI username. Default:
admin. It is recommended to change this. (Optional but Recommended)
-
- Login Password
- Device web UI password. Default:
admin. It is recommended to change this. (Optional but Recommended)
- Syslog Server : IP address of the syslog server. (Optional)
-
- IP Mode
- Choose DHCP or Static IP mode (IP address, netmask, gateway, DNS). (Optional)
-
- Actuator Type
- Normally Closed (NC) or Normally Open (NO) — NC is closed without power, NO is open without power. Available in the WiFi portal only. (Optional)
Integration with Home Assistant
Once the device successfully connects to your WiFi network and the MQTT service, it will automatically appear in the Home Assistant Integrations section under MQTT, using the Device Name you specified in step 1.
Factory Reset
If you ever need to clear saved settings, perform a factory reset using the recessed reset button on the upper-left side of the device. A small screwdriver or similar tool is recommended.
- Power on the ECO1624.
- Press and hold the reset button. The LEDs will illuminate in sequence from 1 through 16.
- Once all 16 LEDs are lit, release the button. The reset is now complete—no additional reboot is required.